How to Seal Headlights the Right Way
Some headlights are usually vented to stabilize pressure in and out of the headlight and to remove any moisture that may accumulate inside. Sometimes, this doesn’t always work due to changes in the external environment.
As such, water droplets can collect inside the headlight through the vent or through a crack. This may affect the performance of your headlight and reduce visibility. The best way to solve this problem is to seal your headlights.
Solution One: How to seal headlights
What you’ll need
- Screwdriver or wrench
- Gloves
- Headlight sealant
Sealing your car headlights
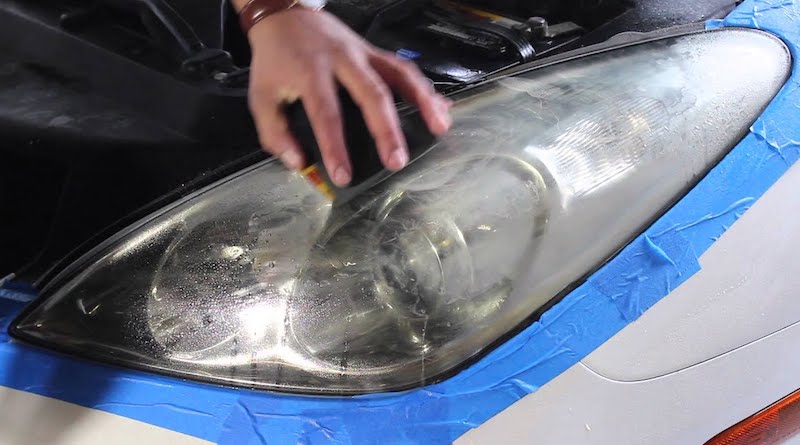
Step 1: Inspect your headlights
This first step is to identify if there are any damages or cracks on your headlights that are allowing moisture to get in. Sometimes, the headlight lens may be loose at its attachment points.
You also want to check if there is any water that has collected inside the headlight. Look for signs of water droplets and condensation. Check for worn out O-rings and seals. A faulty bulb connection might also be the culprit.
Step 2: Remove the headlight
If your headlights are filled with water or moisture, you’ll need to pour out the water and dry the headlight. Start by removing the headlight using a screwdriver or a wrench. You may have to remove ancillary parts like the front bumper to gain access.
Pay attention to any wiring and electrical connectors. Be careful not to rip them when removing the headlight. Ensure that the engine is off when working on the car’s lighting system to avoid any shock or injury.
Once the headlight is out, disassemble it and pour out the water. Wipe if off with a clean microfiber cloth and leave it to dry for a few minutes. You can alternatively use a blow dryer to eliminate all the moisture.
Step 3: Seal the headlight
For this step, you’ll need a vinyl or silicon-based headlight sealant. Both are water and heat resistant. They create an impermeable seal where there’s damage and can be used to put your headlight together.
With an idea of where the crack or fissure is, wear your gloves and apply some headlight sealant to the damage. Ensure that it covers all the areas and that there are no openings left. You can use an old credit card or piece of plastic to spread the sealant.
Most headlight sealants typically dry within 24 hours. However, you can reassemble your headlight back to the car after 15-20 minutes of applying. If by any chance your headlights had a worn out O-ring, you’ll need to buy a new one from the nearest store.
Solution 2: Drill a hole and seal the headlight
This is an alternative solution for sealed beam headlights or for anyone that’s looking to repair their headlights without disassembling them.
What you’ll need:
- Drill
- Headlight sealant
Sealing your headlights:
Step 1: Remove your headlights
Start by removing your headlights from the car. Use a screwdriver or wrench to detach them from their connection points. This is usually a delicate process that must be handled with care. Take care of any ancillary parts that must be put aside in order for you to remove the headlights.
Step 2: Drill a hole
The next step is to drill a hole on the headlight assembly. This allows you to pour out the pool of water inside without having to take the headlight apart. Be careful when drilling to prevent causing severe damage to the plastic lens. A small hole is enough. Leave the headlight to dry for about 15 minutes.
Step 3: Seal the hole
The last step is to seal the hole any other damaged parts of the headlight with headlight sealant. Use enough sealant to ensure the hole and fissures are completely closed. Allow the headlight to sit for a few minutes before reinstalling it back onto the car. Leave the sealant to dry for the specified amount of time.
How do I stop my headlights from oxidizing?
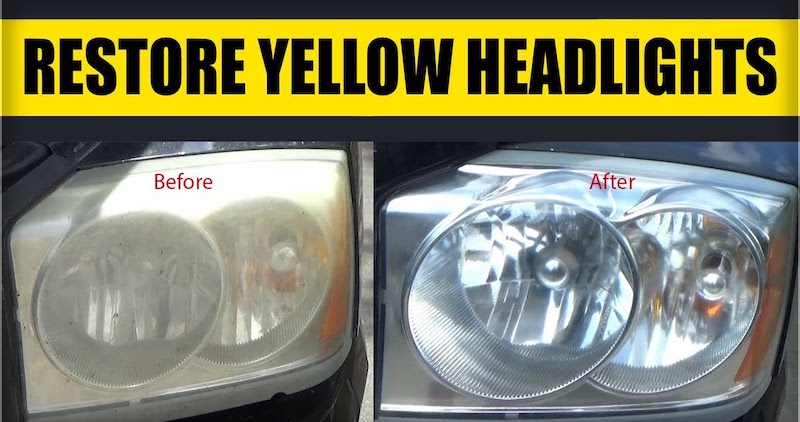
If your headlights have a hazy or foggy appearance on top, this may be the best time to clear them up. Before sealing any cracks, fissures, or holes; start by cleaning the plastic lens to remove the yellowing or discoloration.
You can use several household products, including vinegar, Coca Cola, toothpaste and baking soda, WD-40, or rubbing alcohol. For better results, grab a headlight restoration kit from your nearest auto store and use it to clean your headlights.
Once done, you can now seal them to prevent any moisture, dirt, grime, and water from getting inside. Your headlights will have better illumination and will stay protected from external elements while driving.
Conclusion
Water and moisture can reduce the visibility of your headlights. When the bulb shines, the droplets construct the light. This can make it difficult to maneuver dark roads when driving. The best solution is to buy a good headlight sealant and use it to seal your headlights.
Recent Blog Posts
November 29, 2022
One of the best solutions for fixing hazy headlights is to wet sand them. While there are other ways you can clear up your oxidized headlights, few methods work as great as wet sanding. It not only cleans the plastic lens completely but also achieves permanent results.
November 29, 2022
Headlights that have turned yellow can make a car look really old. The foggy coating that covers the headlight tends to reduce the amount of light emitted on the road. This can affect the driver’s visibility and make it hard to maneuver dark roads.
November 29, 2022
There are plenty of solutions out there when it comes to cleaning the outside of your headlights. You can easily remove the yellow coating that forms on the plastic lens using a few household products.