How to Tint Headlights & Make Them Look Smoking Hot
The most common reason why people tint their headlights is to improve the look of their car. Others take it up as a fun DIY project they can do in their free time. All in all, smoking your headlights remains to be one of the most rewarding projects you can undertake.
The first step before getting down and dirty is to confirm that tinted headlights are legal in your state. Headlights are typically required to illuminate light up to a certain distance. Check to see that the preferred tint keeps your car compliant with the law.
How to tint headlights
There are mainly two ways you can tint your headlights. The first is by using a headlight tint film that goes over the headlight cover. The second is by using a headlight tint spray. Both methods require some level of skill to achieve the best results.
How to smoke headlights using headlight tint film
What you’ll need:
- Screwdriver
- Car soap
- Water
- Microfiber towels
- Isopropyl alcohol
- 2000-grit sandpaper
- Pre-cut vinyl tint film
- Spray bottle
- Heat gun
- Squeegee
- Razor blade
Step 1: Remove the headlight
The first step is to remove the headlight from your car. This process varies from vehicle to vehicle.
However, it mostly involves disconnecting the electrical wires that go to the back of the headlight, unclipping any plastic clips or retainers, and unscrewing bolts.
In some cars, you may have to remove other ancillary parts such as the front bumper or fender well to gain access.
Step 2: Clean the headlight cover
Using car soap and some water, clean your headlight cover to remove grime, dirt, and debris. Wipe the surface gently with a clean microfiber cloth to take care of stubborn stains.
Prep the plastic cover by sanding it with the 2000-grit sandpaper and water. This helps to remove any yellow or hazy coating on an old headlight. Finish by wiping it down with isopropyl or rubbing alcohol.
Step 3: Read the manufacturer’s instructions
When shopping for a tint, pick that which is designed for headlights. They are available as full sheets or pre-cut films for each vehicle model.
If you have the full sheet, you’ll need to cut it into shapes that match your headlight lens. Provide enough allowance for trimming. Remember to check the manufacturer’s instructions on how to use and install the vinyl tint.
Step 4: Install the headlight vinyl tint
Remove the backing that comes with the tint film. Spray some water on the headlight cover and vinyl tint for lubrication. This will help you move the film over the lens easily until you achieve the perfect position.
Once you’ve aligned the tint film, work it on the edges to ensure it sticks well. Spray some water on the surface of the film and using a squeegee, flatten the tint to remove air bubbles and water trapped underneath.
Step 5: Final works on the film
Blow hot air over the tint film using a blow dryer or heat gun to allow the film to adhere to the surface. Start with the low setting to avoid ruining the tint or headlight lens.
Cut out the excess film along the edges using a razor blade. Be careful not to create any scratches on the headlight cover. Finish off with clean and detailed trims along the edges.
Step 6: Reinstall the headlight
The last step is to reinstall your headlight back onto the car. Reconnect the electrical wires at the back and put all the screws in. Ensure your headlights are firmly fixed.
Confirm that the lights work and that they produce enough light for night driving. If they appear too dim, you may have to go with a brighter bulb or a vinyl film with a lower tint.
How to tint headlights using spray tint
What you’ll need:
- Mask
- Gloves
- Safety goggles
- Painter’s tape
- Headlight tint spray
- UV protectant
Step 1: Clean the headlight
Start by cleaning the headlight to remove dirt, debris, and grime. For this step, you may need to use a headlight restoration kit to prep the headlight plastic lens. This is especially if your headlights have turned yellow over time.
Step 2: Cover the surrounding area using painter’s tape
Use painter’s tape to cover the areas surrounding the headlight. This prevents the spray tint from ruining your car’s paint job. Alternatively, you can remove the headlight and work on it on a bench. This provides a safer option.
Step 3: Wear your protective gloves and mask
Before you start working with the spray tint, cover your nose with a face mask and wear your gloves and safety goggles. This will keep you from inhaling the spray or getting some in your eyes.
Step 4: Tint the lens
Read the manufacturer’s instructions on how to use the tint spray. The spray you use should be designed for headlight use.
As you spray it on the headlight, position it perpendicular to the surface, one foot away. Move it from one side to another without lingering on one spot for more than a few seconds.
Spray a light first coat and wait for it to dry. This will allow you to see how dark the tint is and which areas need more tint. Wait at least 15 minutes between each coat.
Avoid touching the lens while spraying to avoid messing with the coating while it’s still tacky. Be careful not to overspray to other parts of the car. Allow the tint to dry.
Step 5: Apply UV protectant
The last step is to apply a UV protectant or clear coat for a clearer finish. This protects the tint from chipping. Leave the protectant to dry overnight then remove the painter’s tape the next morning. If you had removed your headlight, do not re-install it until it’s dry.
Conclusion
As seen above, tinting your headlights is a straightforward job as long as you know what to do. Always ensure that your lights still produce light according to the confines of the law. They should produce enough light for night driving and for maneuvering through harsh weather conditions.
Recent Blog Posts
November 29, 2022
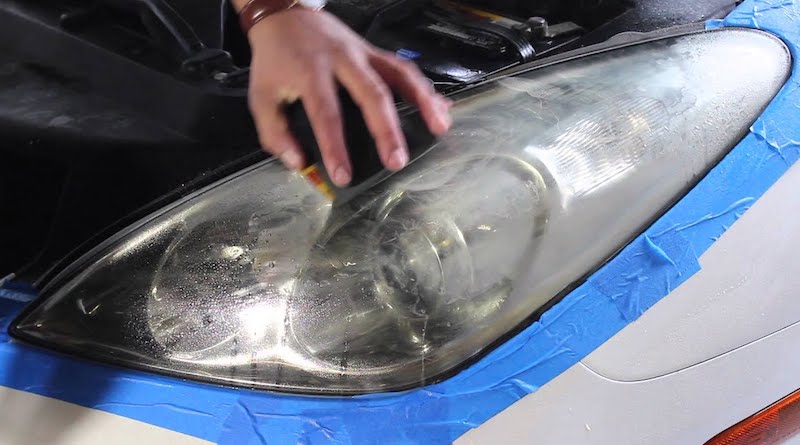
One of the best solutions for fixing hazy headlights is to wet sand them. While there are other ways you can clear up your oxidized headlights, few methods work as great as wet sanding. It not only cleans the plastic lens completely but also achieves permanent results.
November 29, 2022
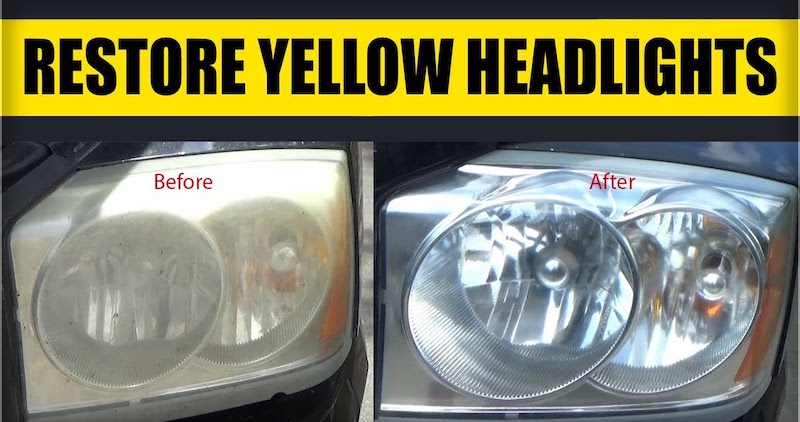
Headlights that have turned yellow can make a car look really old. The foggy coating that covers the headlight tends to reduce the amount of light emitted on the road. This can affect the driver’s visibility and make it hard to maneuver dark roads.
November 29, 2022
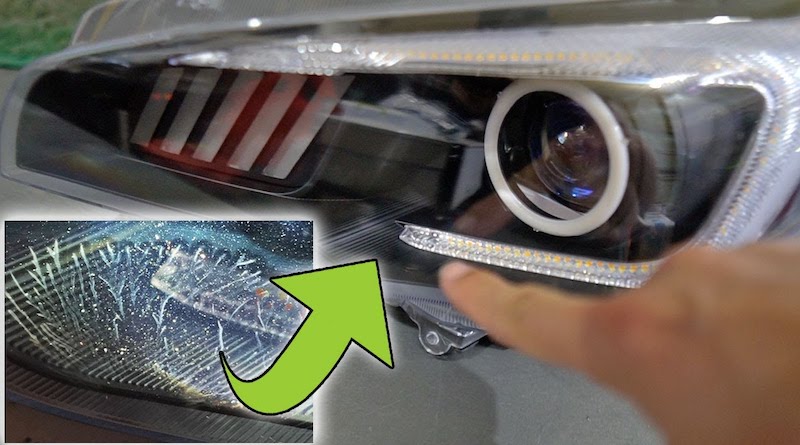
There are plenty of solutions out there when it comes to cleaning the outside of your headlights. You can easily remove the yellow coating that forms on the plastic lens using a few household products.